So what is fall without pumpkins? I mean, really, we’ve done the apples and the Indian corn and if you’re anything like me, you have somehow convinced your husband that you absolutely, positively NEED those barrels of straw, which lets be honest completely DESTROY the trunk of your car, (but they look SO pretty outside your front door with those scarecrows you brought down from the attic stuck right in), but what about those big (or little) orange pumpkins?!
They are a staple of fall, no question. Next to painting or carving, they manage to hold up those barrels of straw quite well when the wind picks up. ( In case you too have found yourself picking up scarecrows- and straw- on a daily basis) It’s been a tradition ever since I was young to go to the pumpkin farm and bask in the excitement of fall. So of course my DH and I are instilling this in our young crew too. Whether you have plans for these pumpkins; carving, painting, cooking, the anticipation leading up to that drive to the farm is awesome in the eyes of your kids.
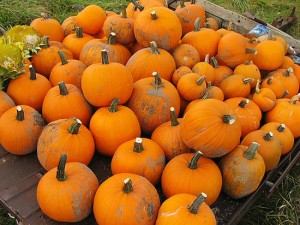
So now you’ve made it to the farm, (and maybe even stood in a line an hour long to get those tickets to ride the pony and camel) now what? Below are some tips for finding that “perfect” pumpkin.
- Keep your eye out for that bright, vibrant orange color. If there is any green discoloration, especially toward the stem, the pumpkin has most likely suffered from frost damage. A dull stem also indicates frost damage. Stems should be black or dark green. Try picking it up, if it breaks, move onward with your pumpkin search
- Pumpkins should be firm, any soft spots can mean decay from the inside. Likewise, avoid brown spots. Spots as small as a fingernail or pencil eraser can indicate an infestation of bugs. And that’s the last thing you want to leave the farm with- bugs!
- My biggest hang- up is the shape. I’m always out to find that perfect “round”. Who isn’t? And rightfully so! These pumpkins provide the largest surface area for painting OR carving and have a mature cavity filled with delicious seeds for roasting!
- If you’re going to cut through the walls, look for a pumpkin that sounds hollow. One for cooking should have thicker walls, which are more difficult to carve.
- Let yourself (or child) fall in love with the pumpkin! A few bumps will add character, so what if your pumpkin looks like its coming off a stooper and isn’t completely oval. As long as your tired pumpkin picker(s) had fun, in the end, isn’t that what it’s about??
- Have fun decorating- remember, you don’t have to carve! My DH usually carves a “family” pumpkin and the kids paint theirs. It’s safer in my eyes, and just as fun for little hands. I’d tell you it’s not as messy, but who am I kidding?! Toddler + paint= messy fun
And if after all that the “experience” just seems too much, remember you can get the same pumpkin for $4.99 at your local Target or Mariano’s. And you don’t have to drive 50 miles. Or pay $25.00 for the same pumpkin. Or be the casualty of cold weather or muddy fields.
So, you’re carving a pumpkin? What are you going to do with all that “goop” in a bowl? Because you need some fun in this whole pumpkin ordeal too, below are 2 of my FAVORITE pumpkin seed recipes.
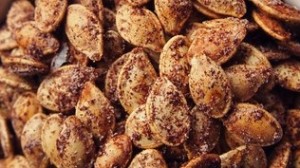
First, run hot water into the bowl and let the seeds float to the top, picking out as many seeds as you can. I often pull out a strainer to make sure that no seed is left behind! Rinse all the pumpkin goop off and spread them out onto a tray. I usually let them dry out overnight.
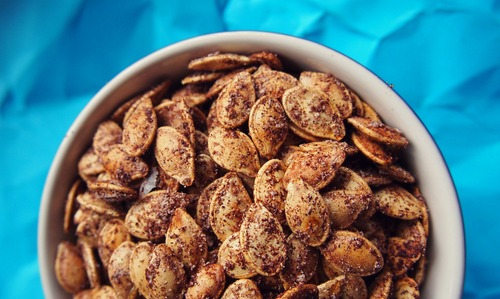
The following morning, preheat your oven to 310 degrees. Dump your pumpkin seeds into a large mixing bowl. Add 1 Tbsp of olive oil ( I always use EVOO), 1/4 cup of granulated sugar (or your sweetener of choice) and 3 Tsp ground cinnamon.
Mix well. Spread out the seeds evenly on a baking sheet. Bake for 30 minutes. Take sheet out and mix them around. Bake another 15 minutes. I like to check my seeds every 5 minutes after the first 30. If you like your seeds with a little more chew you’re probably only going to want to put them in for an additional 10-12 versus the 15. If you want them super duper crunch, shoot for the additional 15. You may find yourself putting them in for another 2-3 minutes after. (It will not ruin the seeds if you open them to check them)

For something a bit more savory, elminiate the sugar and cinnamon and mix with a packet of dry ranch seasoning (like a Hidden Valley or Knorr’s) following all the steps above. Regardless of which route you go, they’re both finger lickin’ good!
XO,
Melissa

